Understanding the Basics of Auto Layout in Figma
Creating Beautiful Designs Has Never Been Easier with Figma's Auto-Layout Feature

I am driven by the desire to create designs that are both visually appealing and user-friendly. With several years of industry experience, I have honed my skills in creating user interfaces that are simple, intuitive, and engaging. Through research, testing, and collaboration with other team members, I am always looking for new ways to improve the user experience. I have a keen eye for detail and a thorough understanding of design principles, enabling me to produce designs that are both functional and aesthetically pleasing. I am dedicated to delivering designs that exceed expectations and delight users, whether I am working on web or mobile projects.
Figma Auto-Layout is a powerful feature that allows designers to create responsive designs and layouts without the need for manual adjustments. This feature can save a lot of time and effort, and it makes it easy to create consistent and professional-looking designs.
In this article, we will explore the benefits of using Figma Auto-Layout and provide some tips and tricks to help you get the most out of this powerful tool. Whether you are new to Figma or an experienced designer, you will find valuable information here that can help you create better designs and improve your workflow. So, let's dive in!
What is Auto Layout?
Design software like Figma has an auto-layout feature that helps you build responsive designs that can adjust to various screen sizes and device types. Designers can define guidelines for how elements should resize and alter based on the available space using auto-layout. This eases the stress of having to manually resize and adapt objects for various screen sizes.
Is Auto Layout important in UI/UX Design?
The straightforward answer is yes. In terms of UI/UX design, auto-layout is undoubtedly a very useful tool. Devices and screens are constantly changing—changing in size and changing in resolution. It is vital to create designs that are responsive and adaptive to different screen sizes.
Figma's auto-layout feature makes it easy to put objects together and make them responsive by automatically changing objects according to their position and size in relation to the parent container. This saves time and ensures that the work is consistent across all devices.
Aside from aiding responsiveness, auto layout in Figma has some important primary advantages;
Auto-layout saves time by reducing the amount of time they spend on manual layout adjustments. You can use auto-layout to create responsive and adaptable designs quickly and easily, without having to worry about the details of each individual element.
By keeping the same spacing, alignment, and padding throughout the design frames, auto-layout helps to ensure that properties are consistent. This aids the creation of a more unified and professional-looking design.
Designers can easily make changes without affecting the overall layout, making it easier to collaborate.
Improves design responsiveness by ensuring that it adapts to different devices. Auto-layout also helps to create designs that look good on any screen without having to make significant changes.
Auto layout shortcuts in Figma
In Figma, using auto-layout keyboard shortcuts helps a user save time and put together perfectly aligned objects more effectively. Some of Figma's most practical auto-layout shortcuts are listed below:
SHIFT + A: Adds auto layout frame to an object or a group of the selected objects.
SHIFT + ALT + A: Changes an auto layout frame into a standard frame.
CMD(on Mac) or CTRL(on Windows) + SHIFT + G: This shortcut removes auto layout from a container.
CMD(on Mac) or CTRL(on Windows) + D: Duplicates objects in an auto layout.
Basic auto layout properties
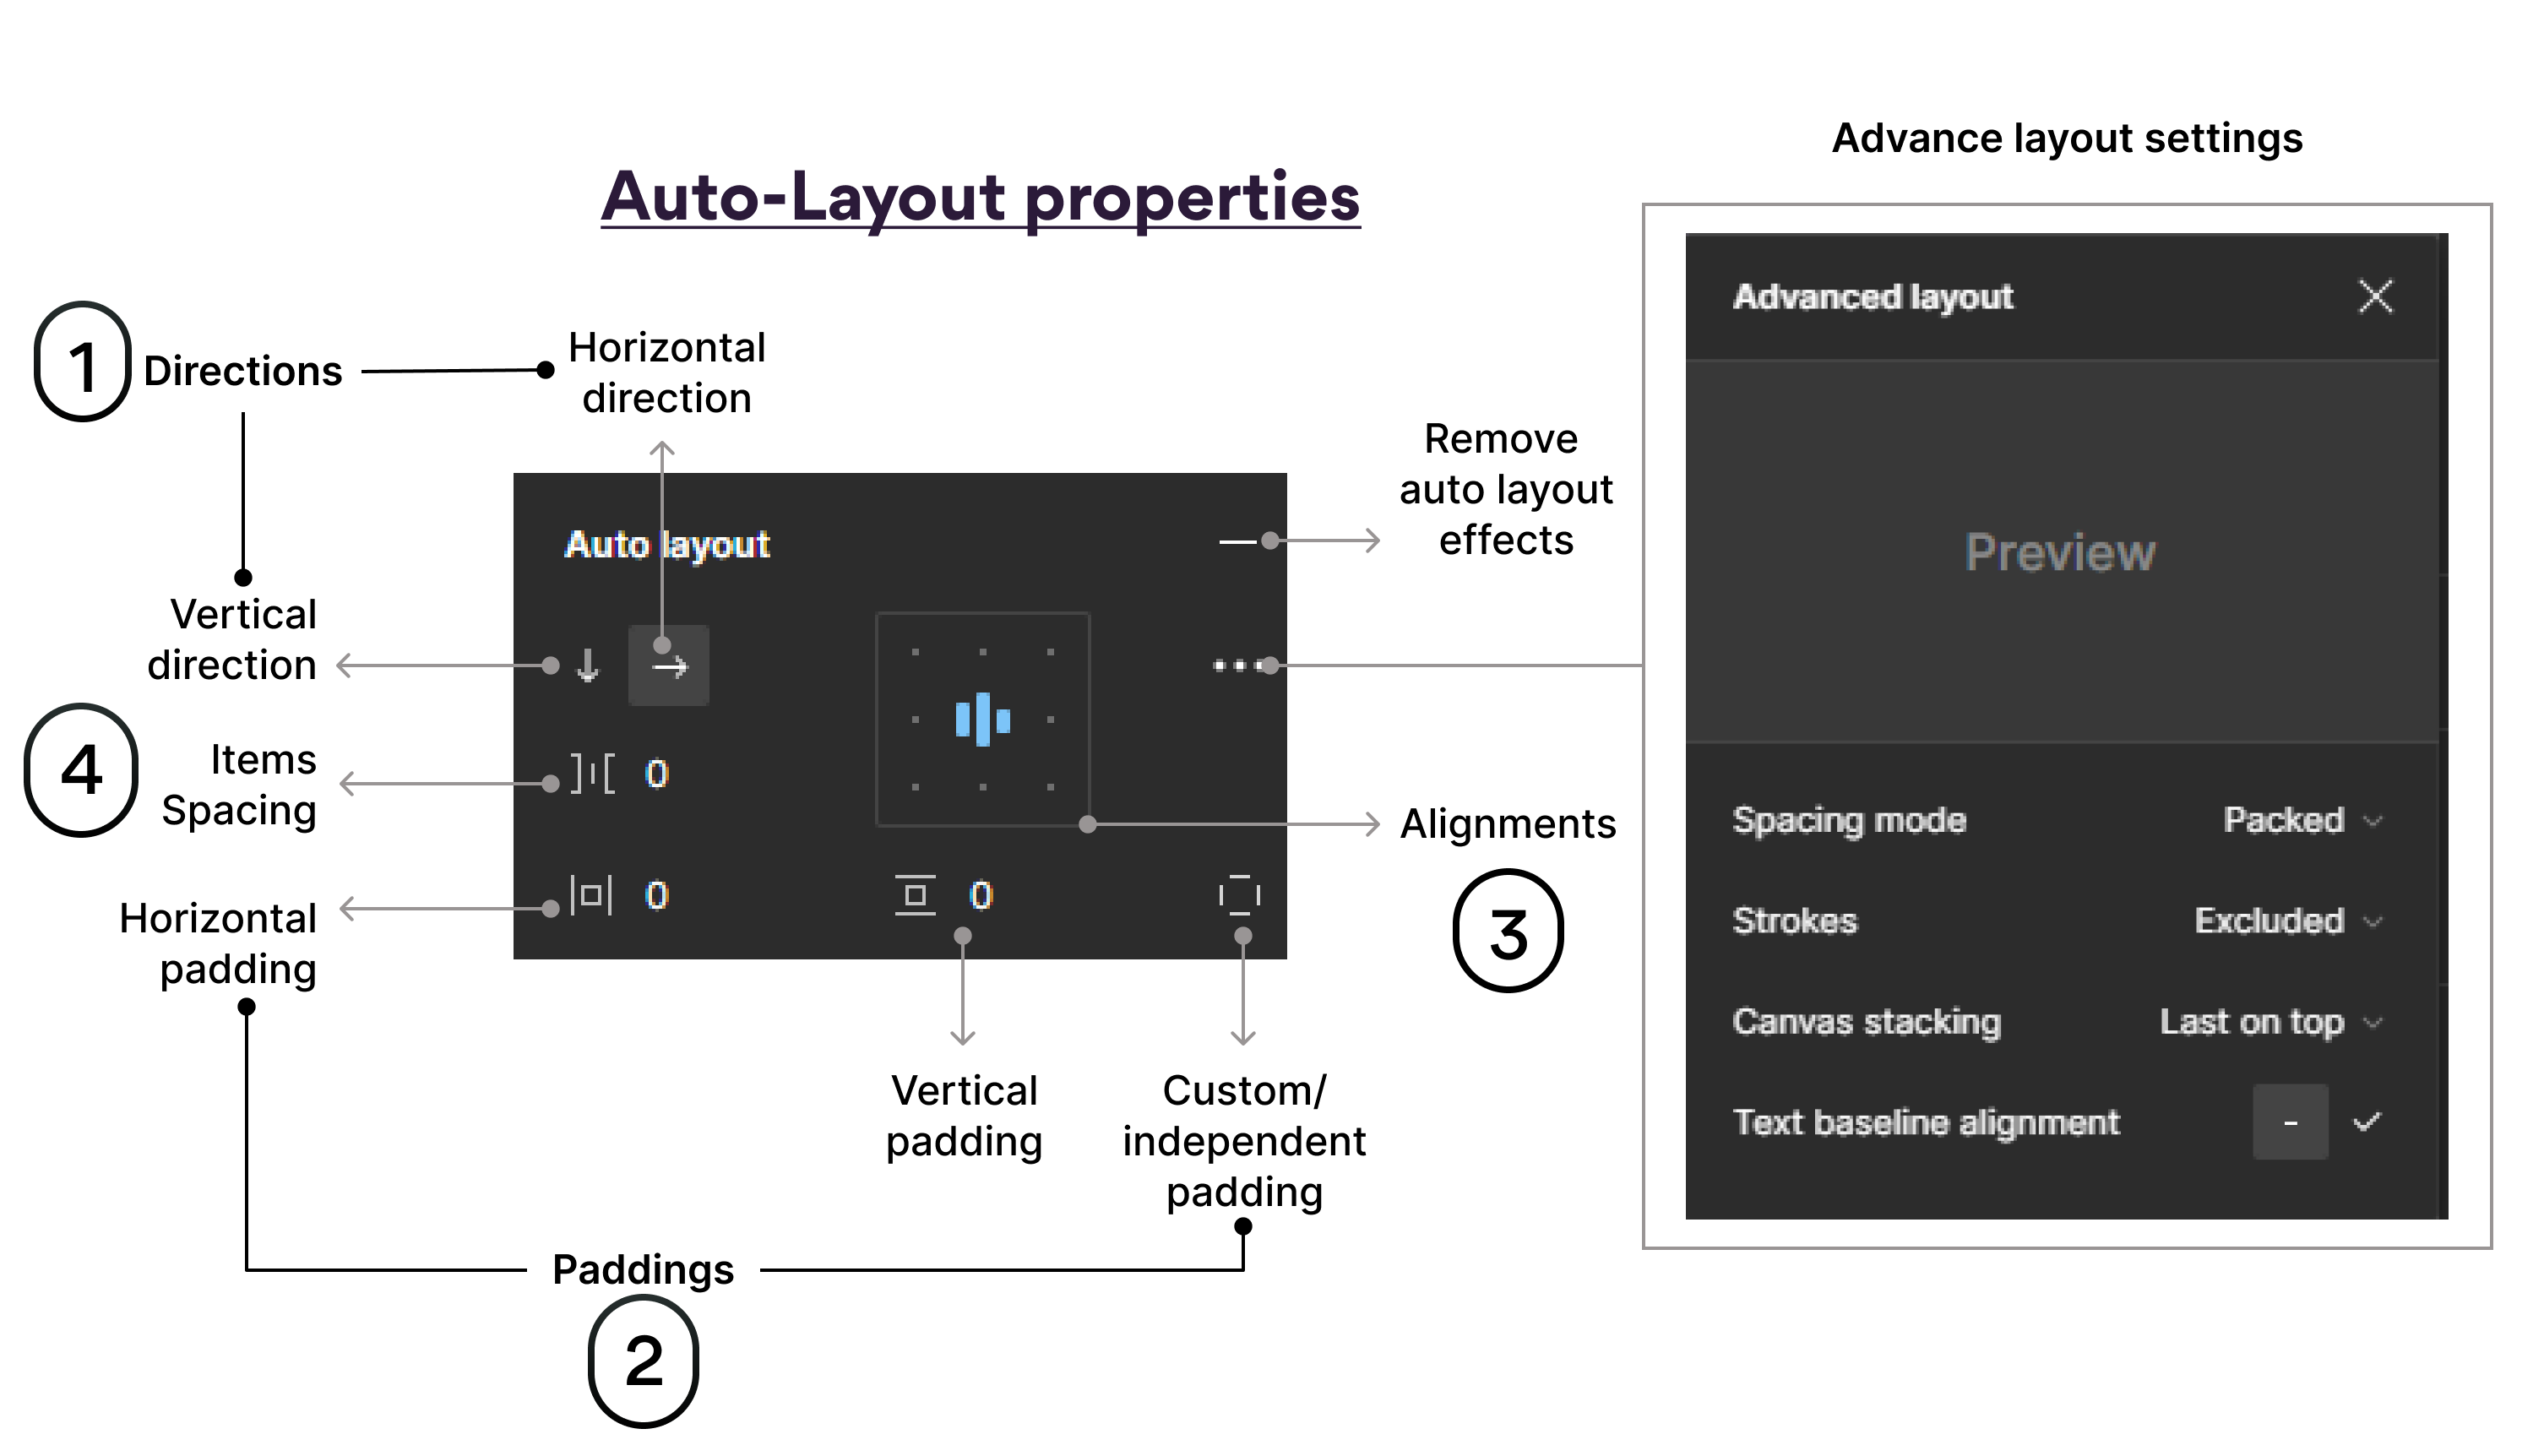
Here are some of the key properties of auto-layout frames in Figma:
Direction: This allows you to choose between a row-based(Vertical) or column-based(Horizontal) design arrangement. Using Figma's auto layout feature have two directional options to help align and place objects inside of their parent containers. The two directional options offered by Figma's auto layout are explained below:
Horizontal: With this option, objects can be horizontally aligned inside a parent container. These objects are dynamically modified according to the size of the container and placed next to one another.

Horizontally aligned objectsVertical: This option vertically aligns elements within a parent container. When this option is selected, objects are stacked on top of one another and dynamically adjust based on the size of the container.
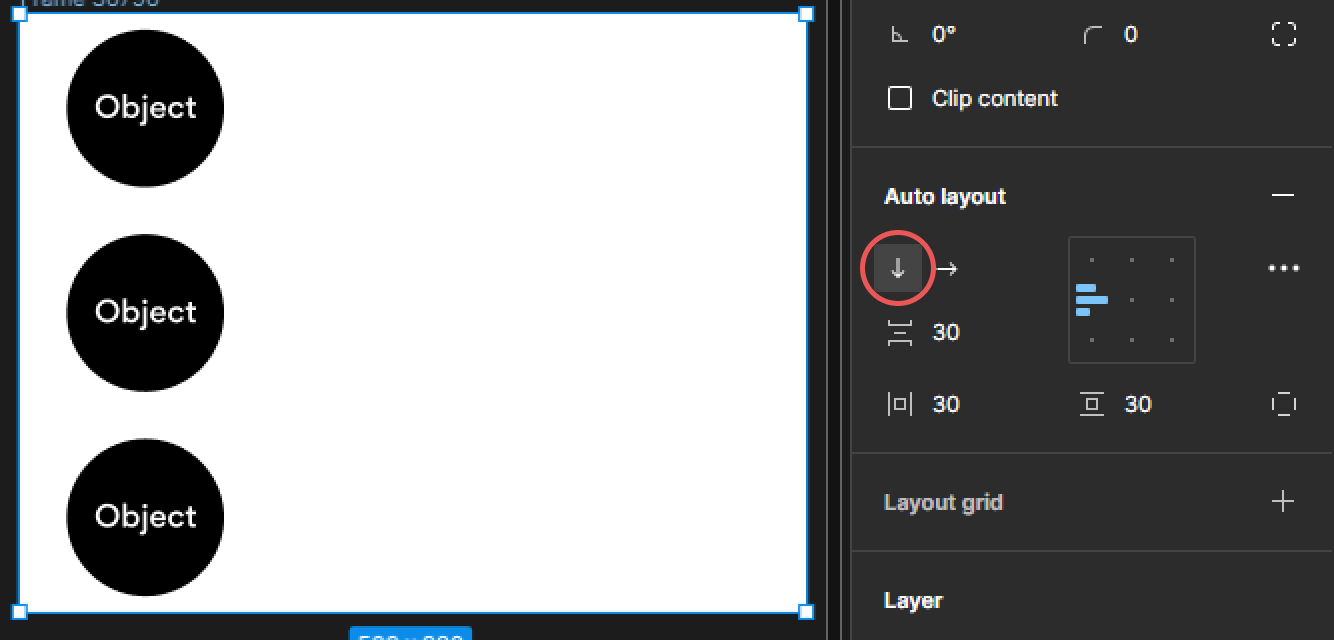
Vertically aligned objects
Padding: This defines the distance between objects in an auto-layout frame and the frame (container) either horizontally or vertically.
Alignment: This allows the setting or allocation of precise positions and alignment of objects within the designs.
Spacing: This allows designers to control the distance between objects in a frame.
Spacing Mode: Spacing mode between objects in a frame can either be Packed or Space Between.
Packed: Objects are placed as close together as they may be in Packed mode while still complying with any limitations that have been initially established. This mode is helpful when creating a design with little space between objects.
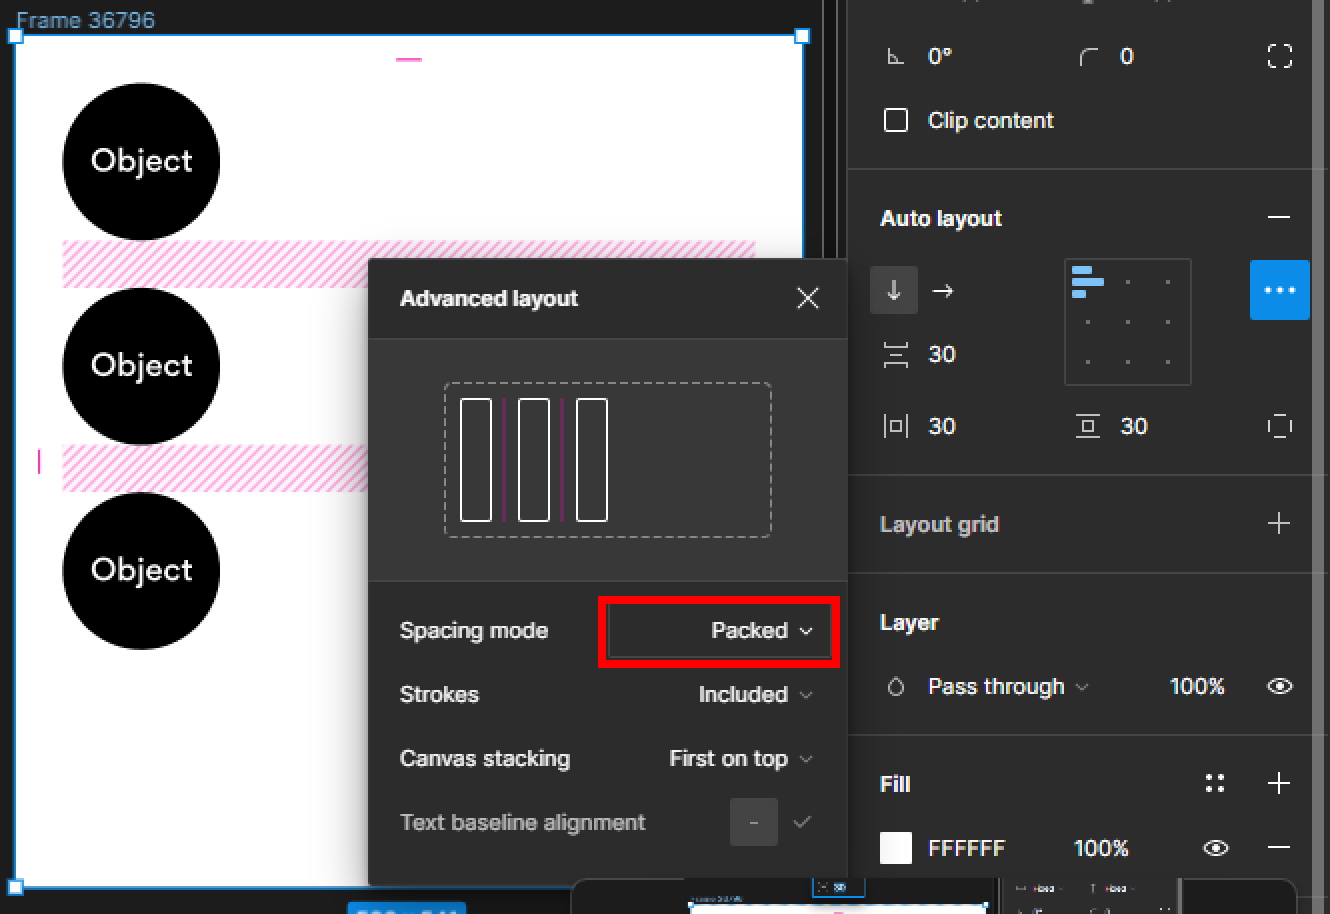
Packed objects spacing modeSpace Between: In the Space Between mode, objects are distributed uniformly within their parent container, with the first and last objects fixed to the container's edges. This option is helpful when you want to make a design with consistent space between parts.
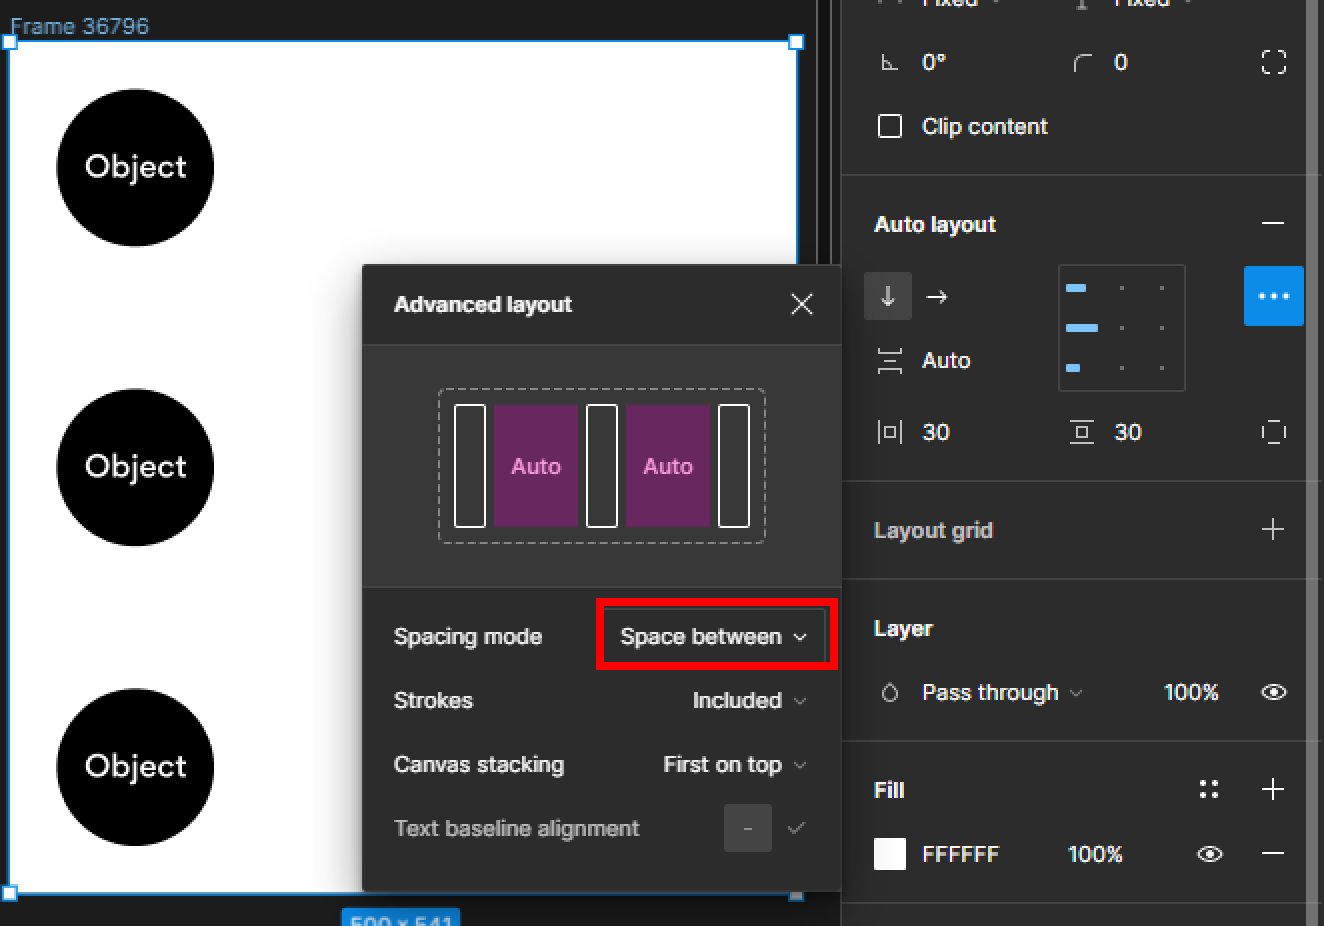
Space between objects spacing mode
Auto layout alignments in Figma

Auto-layout alignments play a significant role in producing responsive and reliable designs in Figma. With the aid of auto-layout alignments, you can create layouts that adapt to modifications in available space, particularly variations in screen size, without having to manually adjust each and every object on the artboard.
These alignments include:
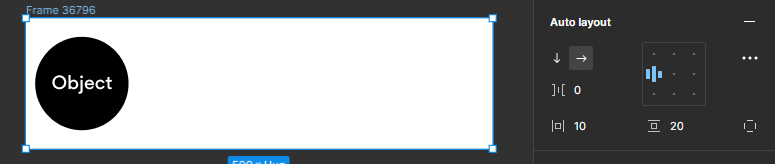
- Top-Left, Top-Center, and Top-Right Alignment: This refers to how objects are positioned in relation to their parent container. An object is positioned in either the top-left, top-center, or top-right corner of its parent container when aligned to flush toward any of these respective corners. Visual examples are displayed below with the alignment icons highlighted in blue.
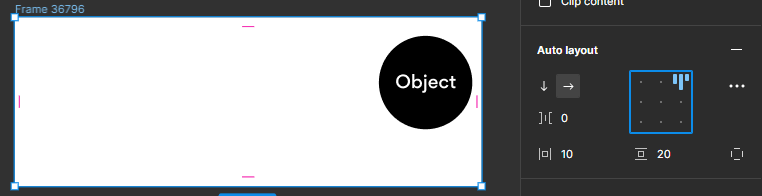
Top-Right Aligned object
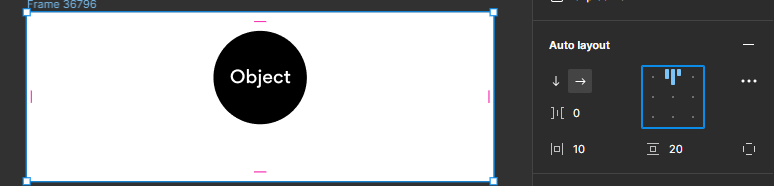
Top-Center Aligned object
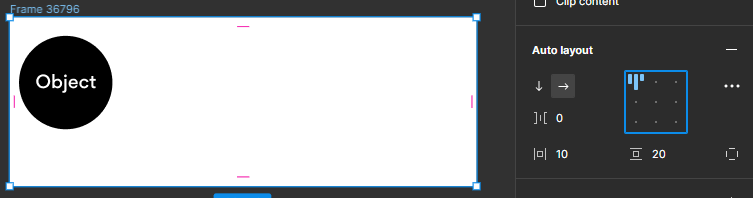
Top-Left Aligned object
- Bottom-Left, Bottom-Center, and Bottom-Right Alignment: These choices guarantee that objects are placed flush with the corners they are aligned to in the parent container, respectively. This guarantee that these objects remain in their original positions even if the container's size or contents change by utilizing these alignment options. Visual examples are displayed below.
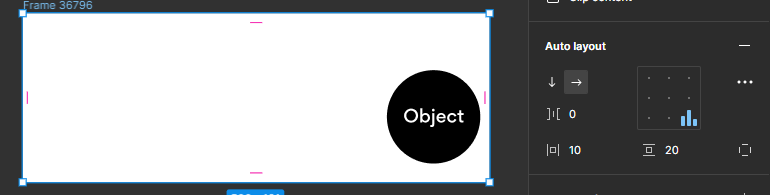
Bottom-Right Aligned object
Bottom-Center Aligned object
Bottom-Left Aligned object
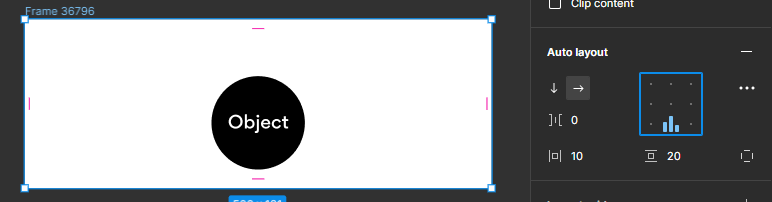
Center alignment: This alignment can be used to center an object within its container either horizontally, vertically, or both. Below is a visual example of this alignment setting.
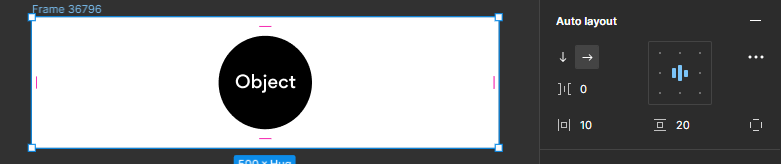
Center Aligned object
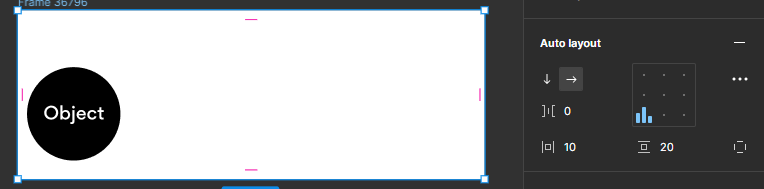
- Center-Left and Center-Right Alignment: Center-left alignment places objects horizontally in the center of the container, but closer to the left edge, whereas center-right alignment places objects horizontally in the center of the container, but closer to the right edge. With that in place, there is more room between the object and the opposite edge of the container than between the object and the edge of the container to which the item is aligned. Visual examples are displayed below.
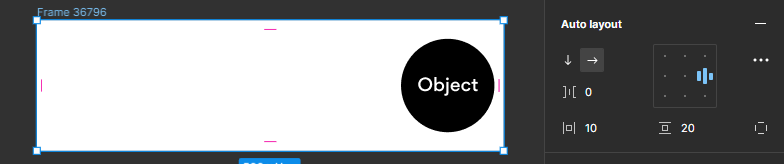
Center-Right Aligned object
Center-Left Aligned object
Conclusion
Auto-layout feature is a handy tool in Figma that can assist you in creating responsive, adaptable, and visually appealing designs. Auto-layout helps to speed up the design process, increase consistency, improve collaboration, increase responsiveness, and reduce errors. It ensures that objects are positioned and resized relative to their parent container using its constraint-based system, allowing you to create designs that are flexible and adaptable to devices with different screen sizes.
Auto-layout spacing, alignments, and positioning options further enable designers to control the layout and spacing of objects within a design, ensuring a more organized and balanced design.
Overall, auto-layout in Figma is a very helpful tool for designers who want to create modern, effective designs that meet the needs of their users.
The resources below will provide you with more insights into Figma's auto layout feature;
visit:
https://help.figma.com/hc/en-us/articles/5731482952599-Using-auto-layout
https://uxdesign.cc/10-auto-layout-tips-in-figma-23f530c8098a
Auto Layout: Learn to create flexible designs and components (YouTube video)
Thank you for reading my article. I hope you've learned a thing or two from it.
Kindly follow me🙏, like my article, drop your comments 💭 and share.
You can check out my design visuals on Behance, Dribbble
You can connect with me on LinkedIn and Twitter.
Make it simple, but significant.🕊️
